As a very active contributor on Shutterstock, I am always encouraging my friends and fellow photography enthusiasts to sign up to Shutterstock and start submitting their work. Most have never submitted to stock photography agencies before and don’t know where to start. Here is the advice that I give them.
Create a Shutterstock Contributor Account
Step 1 is to create a Shutterstock Contributor Account. It takes less than 5 minutes and involves the usual things like creating a username and password and providing an email address. Once you verify your email, you can then go to your Account Settings (which is located in the dropdown menu under your name) and fill in your personal information and your preferred payment method (PayPal, Payoneer, Cheque, or Skrill). Be sure your mailing address is accurate as it relates to your tax forms.

Select Your Photos
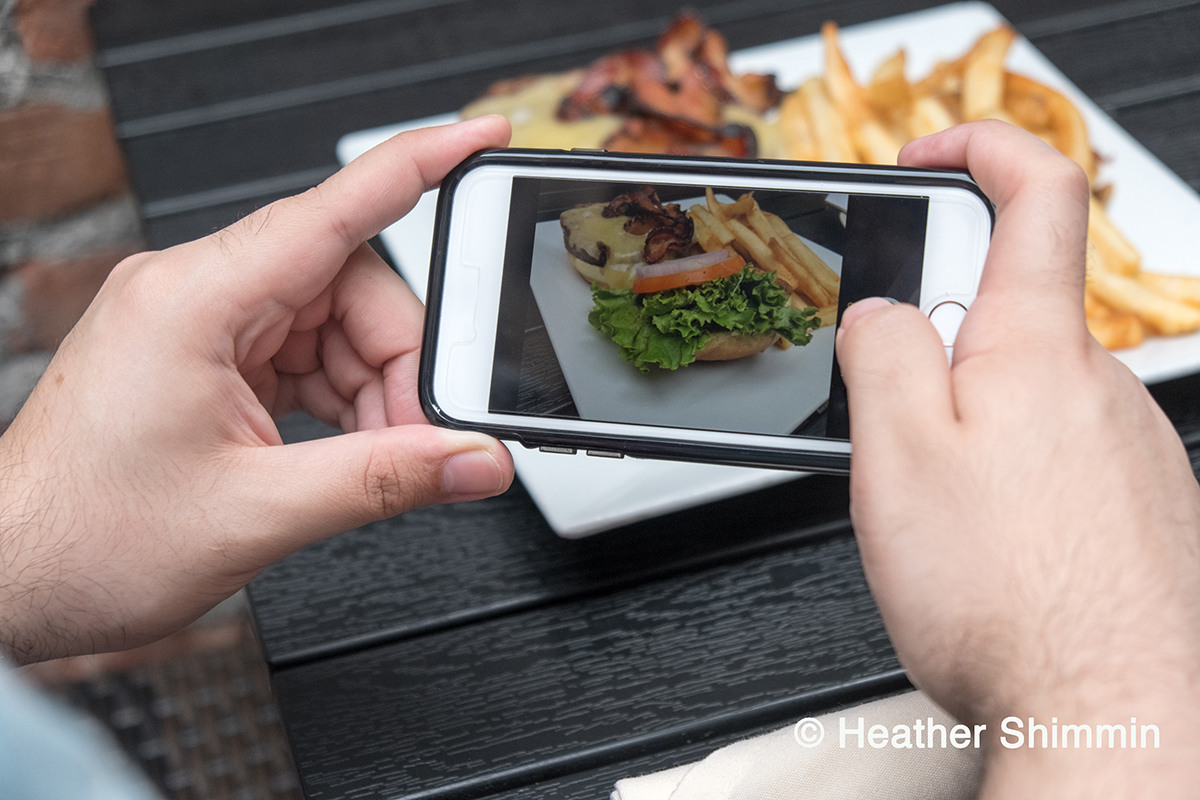
Choose 10-15 of your best shots. They can be from the same shoot/location if you wish. You can submit more on your first try, however, I do not recommend it since it’s your first go and you may not know all of the rules about what types of content you can submit. Get your feet wet, get a feel for how this all works, then move up to submitting larger batches.
Once you have selected the images, you need to inspect them for quality and compliance issues. But before you do that, you need to determine if the images are at least 4MP (not MB) as Shutterstock only accepts images that are a minimum of 4 megapixels. To determine this, multiply the image’s width by its height. It needs to be 4,000,000 or greater to be 4 megapixels. For example:
2,000 x 2,400 = 4,800,000 (4.8 megapixels)
For more information on Shutterstock’s technical requirements, see this article.
Quality Check
Now for the quality inspection. View the image at 100% and ask yourself:
• Is the main subject in focus?
• Is there a lot of noise?
• Are there any sensor or dust spots?
• Is it over- or underexposed? Hopefully not, otherwise you would not choose the image as one of your top 10.
• Is the horizon line straight?
• How is the overall composition? Is there a head cut off or finger over the viewfinder? (gasp!)
Compliance Check
Now on to the legal bits. These requirements relate to commercial content. If you do not meet these requirements you cannot submit this content for commercial use. But it could be considered for editorial use if there is no restriction on the location as per outlined in the Known Image Restrictions List.
Requirements for Commercial Content
• Is there a recognisable person(s) in the image? If yes, then you need the model(s) to sign a model release. If you need a model release form, you can download Shutterstock’s model and property releases for free here. I also use Easy Release, which allows the model to sign the release on your smartphone or tablet.
• Are there any visible trademarks?
• Was the image taken on private property? If so, you’ll need a property release from the owner.
• Was the image taken at a restricted location? Or contain an item that is protected by copyright, such as a Rubik’s cube? See the Known Image Restrictions List to find out. Some locations and items cannot be licensed at all, such as Pound Sterling Banknotes (the Queen says so, that’s why).
If you do not think that your content is acceptable for commercial use, you can submit it for Editorial Use. Editorial content is used to by news organisations to illustrate news or stories of human interest. Commercial content is used to sell a product. The uses are different therefore the rules are different as to what you can submit to each. For a more detailed explanation, please see the article I wrote on the Difference Between Editorial and Commercial Content.
When you are done editing your images, change the colour profile to sRGB and save them as JPEGs.
Upload Your First Batch of Images
Once you’ve logged into your Shutterstock Contributor Account, select “Upload” from the grey menu bar.

Upload those 10-15 photos that you’ve worked on. Once the images have been uploaded, you’ll have to prepare them for submission. This means that you need to enter the title, keywords, and attach releases (if needed), as well as choose an appropriate category and location, if applicable, for each image.
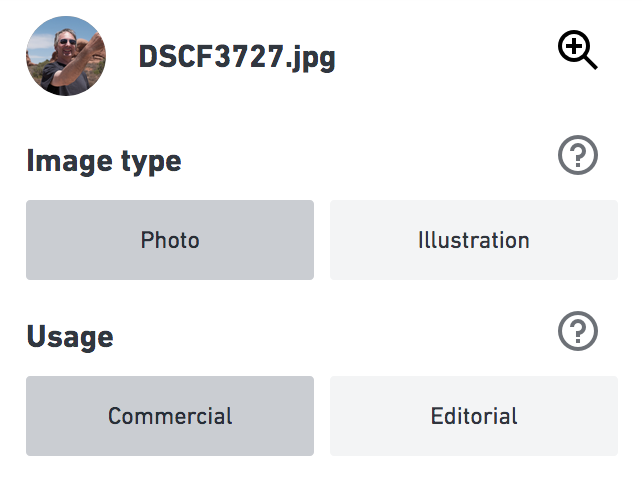
Image Type and Usage
When content is uploaded, by default it is classified as a photo for commercial use. If you plan on submitting illustrations or vector illustrations, you would choose illustration. This is also where you would select Editorial for Documentary and Illustrative Editorial content.
Editorial Captions
If you are submitting editorial content, you need to have a proper editorial caption. Best practice is to follow this format:
CITY, STATE, COUNTRY – DATE: Factual description of the event including who, what, where, when, and why.
For more information you can read How do I Submit My Editorial Content?
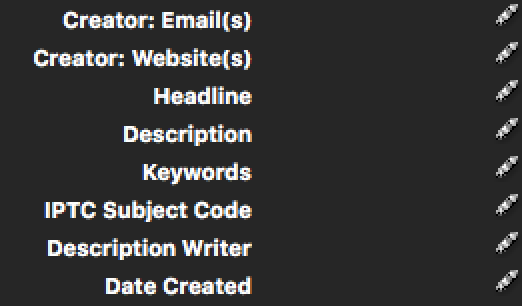
Adding the Metadata
Metadata means many things, but in this instance it refers to the title and keywords. The title (also called description) and keywords of your image are vital because this is how customers are going to find your content. Shutterstock has millions of images. The more detailed and accurate your metadata is, the higher your changes of a customer finding (and hopefully licensing) your content (which means money!). For example, I just searched for “dog” on Shutterstock’s library. It yielded 2.6 million results. I amended that search with “dog scotch collie” and narrowed it down to 600 results. Specificity is key. There are no shortcuts with metadata. It has to be done by hand and it takes time. Don’t be a lazy contributor. Take the time to put in descriptive and accurate information. For more details on metadata best practices, here’s a great article, Title and Keyword Guidelines, Policies and Best Practices.
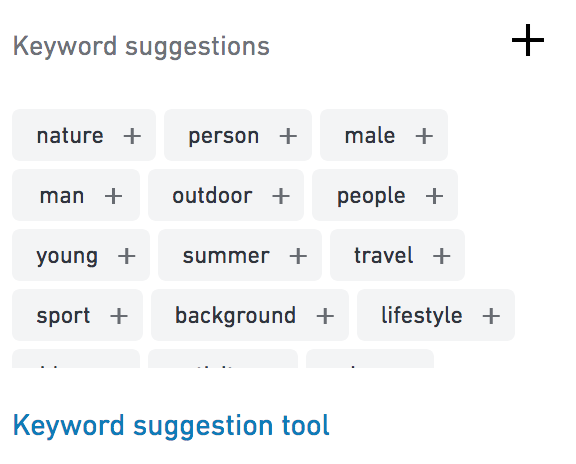
Shutterstock also has a great tool called the “Keyword Suggestion Tool.” A few keywords are selected for your chosen image that you can add to your photo. You can also click on the link below the suggested keywords and find even more great suggestions by putting in some search terms that describe your image and choosing at least three images that are close to yours. From there you can add related keywords to your image.
Embed the Metadata to Your Image’s EXIF Data
After you finish adding the metadata to your image, I highly recommend that you embed this information in the EXIF data, be it through Adobe Bridge (it’s free!) or Lightroom, so you do not have to do this again if your image is rejected and you need to resubmit it, or if you decide to submit to another stock agency. If you are using Adobe Bridge, The TITLE of the image goes in the DESCRIPTION field and the KEYWORDS go in the KEYWORDS field.
Choose the appropriate Category
This one is pretty self-explanatory. You have the option to select two categories. Choose the one(s) that best fits your image. See this article on what Shutterstock prefers goes into which category.
TIP: Be sure to save periodically; there is no autosave in Shutterstock’s Content Editor.
Attach Releases
If you have any releases to attach, hit the plus sign next to releases, which will allow you to upload a release from your computer. You can then name it and, for model releases, add additional information such as the model’s gender, age range, and ethnicity, which further helps customers find the type of content they’re looking for.
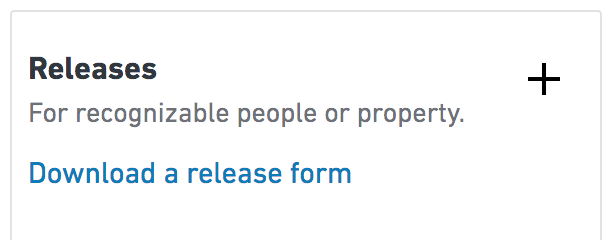
Shutterstock will also store your releases so you do not have to upload the same release more than once.
TIP: You can bulk apply releases and metadata to files. You do not have enter them one at a time.
Add a Location
A relatively new feature is the Location option. If the content is a still life of a bowl of fruit, for example, the location is not really that important. But for things like landmarks and cityscapes, it’s helpful for the customer to know where the image was taken.
Submit your Files
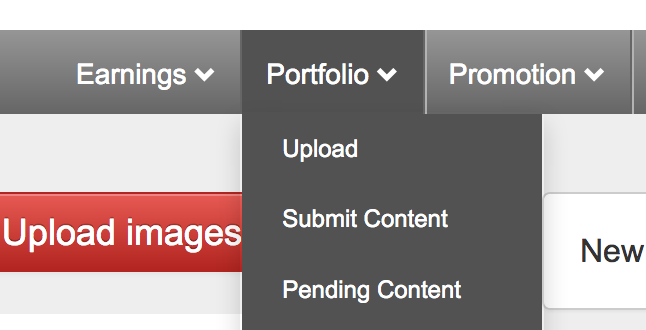
Once you’re ready, select the files you want to submit and hit submit. You do not have to submit everything in the Content Editor at once. If you only want to submit 5 at a time, that’s fine, too. Or can work on them and come back later (be sure to save!). If you do want to come back later and work on your photos, you can return to your un-submitted files by going to Portfolio > Submit Content.
TIP: Shutterstock has a great mobile app. It lets you upload content, add keywords, select a category, and submit your content all from your phone. You can also check your earnings and add metadata to content you uploaded from your desktop.
More Resources
I’ve given you a basic rundown on how to submit your content to Shutterstock. Shutterstock also has a huge, wonderful Contributor Support centre with articles and how-tos, including a link to articles to help get you started.
Rejections
Sooner or later, your content will be rejected. But don’t be discouraged! We learn from our mistakes. Missed that logo on the sunglasses? Forgot to have a witness sign your model release? Well, now you know.
Shutterstock’s support centre has an article for just about every rejection reason and helps you understand Shutterstock’s policies and standards. Here’s their article on Model Releases, for example, which also explains when one is needed and what the requirements are.
So get out there and shoot some great content and make a goal to submit x number of images a week! Pick a reasonable number, like 10, so you don’t get overwhelmed. It’s achievable and you’ll get that warm and fuzzy feeling when you do.
Really good article. Thank you.
Thanks! So glad you enjoyed it!